
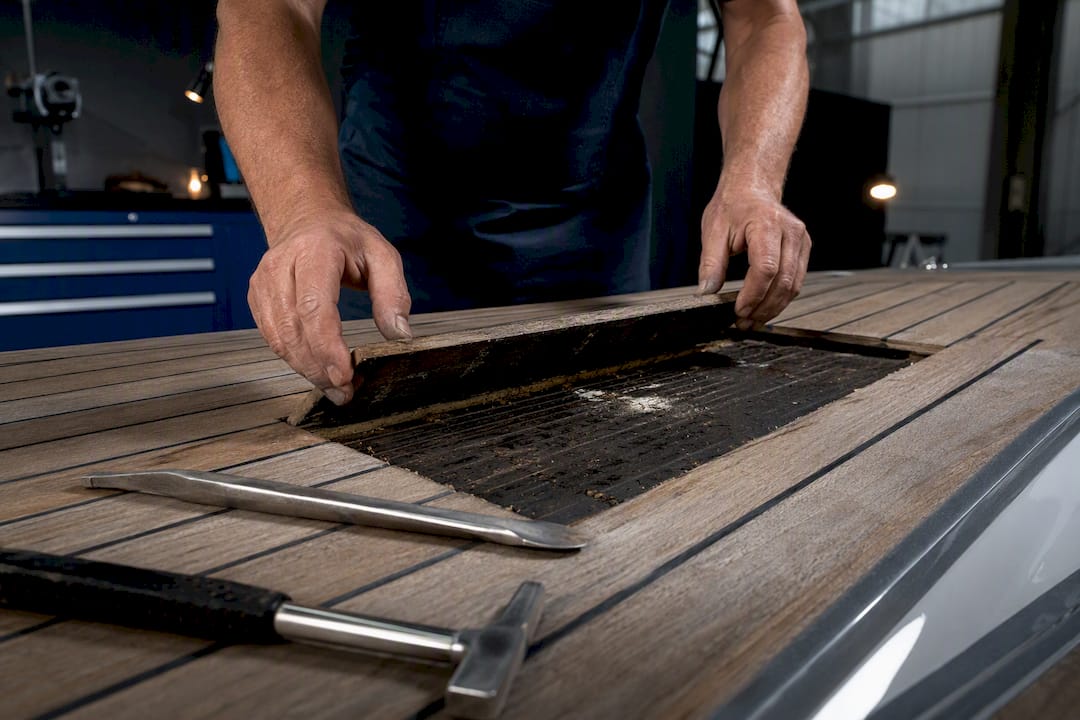
If your teak is checked but stable, tapping solid, and the substrate underneath is dry, repair it and save the money. If planks are thinning past 6mm, fasteners are exposed, or you get a hollow thump anywhere on deck, you’re looking at teak deck replacement, and a realistic U.S. budget typically runs in the mid to high hundreds per square foot depending on material and hidden damage. The checklist and cost breakdown below will tell you which category you’re in.
TL;DR:
- Repair is viable only if the substrate is sound, the damage is localized, and plank thickness remains above 6mm, avoiding active leaks.
- Full replacement costs can range from $75 to over $300 per square foot depending on material type, deck size, hardware complexity, and substrate repairs.
- Substrate damage, hidden rot, or soft spots discovered after old teak removal significantly increase repair costs and project duration.
- Proper installation involves thorough inspection, accurate templating, and avoiding shortcuts in substrate repair to prevent unexpected delays and expenses.
- Engaging experienced project management and prioritizing substrate evaluation before quoting can save owners tenfold in unforeseen costs and schedule overruns.
Table of Contents
- What Signals Repair vs. Full Teak Deck Replacement?
- What Does Teak Deck Replacement Actually Cost?
- How Does a Teak Deck Replacement Actually Get Done?
- Teak, Synthetic Teak, Cork, or Painted Non-Skid: Which Fits Your Boat?
- Tools, Adhesives, and Safety Gear for the Job
- What Hides Under Old Teak, and What It Costs to Fix
- How Long Does It Take, and What Does Project Management Cost?
- Should You Hire a Yard or Do It Yourself?
- How Long Will Your New Deck Actually Last?
- Why Project Oversight Matters More Than the Material Choice
- The Real Lesson in Every Teak Deck Job
- Sources
What Signals Repair vs. Full Teak Deck Replacement?
Most owners overestimate how bad their deck actually is, and just as many underestimate it. A quick, methodical check settles the argument before you call a yard.
Repair usually holds up when the substrate is sound and the damage is cosmetic or localized. Small jobs like re-caulking seams or swapping a handful of planks are genuinely cost-effective, and industry data on repair versus replacement shows these fixes commonly buy another 5 to 10 years of service when the deck underneath is dry.
Full replacement becomes the right call when the damage is systemic rather than isolated.
Signs repair is enough:
- Localized graying or checking with plank thickness still above 6mm
- One or two soft or cracked seams, but no water intrusion below
- Surface stains, mild cupping, or worn caulk lines on an otherwise flat deck
Signs you need replacement:
- Plank thickness worn below 6mm across multiple areas (measure with a caliper at a screw hole)
- A hollow or “papery” thump when you tap the deck with a mallet, especially near hardware
- Exposed or corroded fasteners, visible core discoloration, or soft spots when probed with an awl
- Seams pulling away from planks in multiple locations, not just one or two spots
If you find soft substrate or active leaking, stop using that area and cover it to keep water out until you can address it. Water sitting in an exposed core is what turns a $3,000 repair into a $30,000 replacement.
What Does Teak Deck Replacement Actually Cost?
The honest answer is “it depends,” but the ranges are knowable once you understand what drives them. Teak Decking Systems notes that deck size, material grade, substrate condition, installation complexity, and location all move the number independently, which is why no two yard quotes look alike.
Material costs by type:
- Premium plantation teak, thick planks: material costs are at the higher end per square foot
- Standard-grade teak: material costs vary depending on grade and availability
- Synthetic teak (Flexiteek, PlasDECK, SeaDek): typically well below premium real teak on an installed-cost basis, with faster fabrication when a yard has template or CNC-cutting capability
Labor usually costs as much as the material, sometimes more. Yard labor rates for skilled deck work commonly run $75 to $150 per hour depending on region, and a project’s total labor hours swing hard based on access. A flat cockpit floor with no hardware to work around installation fast. A curved foredeck packed with cleats, hatches, and stanchion bases takes far longer per square foot, because every fitting has to be cut around, re-bedded, and sealed.
Cost Reality Check: Installed teak deck replacement typically costs several hundred dollars per square foot including labor, adhesives, and finish work, with full-boat projects on larger yachts costing significantly more. Smaller synthetic installs on cockpits or swim platforms can come in far below that range.
Hidden costs are where budgets blow up, and they’re rarely optional once discovered. Substrate repair, hardware replacement, and complex plank patterns (herringbone, picture-frame borders) all add cost after the quote is signed. Build in a 15 to 20% contingency on any project where the substrate hasn’t been inspected yet.
Three example budgets:
- Cockpit only (150 sq ft), synthetic: $8,000 to $15,000 installed, minimal substrate risk
- Mid-size deck (400 sq ft), standard teak: $45,000 to $80,000, moderate hardware complexity
- Full flybridge and deck (900+ sq ft), premium teak: $150,000 to $300,000+, high hardware density and likely substrate repair
How Does a Teak Deck Replacement Actually Get Done?
Replacing a deck follows a set sequence, and knowing where the time and money concentrate helps you sanity-check any yard’s timeline.
- Measure, template, and order. The crew documents existing plank width, seam pattern, and hardware locations, then orders material to match. Skipping documentation here is how owners end up with a deck that doesn’t match the original layout.
- Strip and clean. Old teak comes off, followed by the tedious part: removing decades of old adhesive residue from the substrate. This step is genuinely labor-intensive, and Practical Sailor’s field reporting on teak removal confirms it routinely uncovers substrate issues nobody knew existed.
- Inspect the substrate. With the old teak gone, the crew probes for soft spots, delamination, and moisture before anything new goes down. This is the point where “surprise” repairs get identified.
- Repair the substrate as needed. Any core damage or delamination gets addressed now, never after new teak goes on top of it.
- Install the new deck. Modern installs increasingly bond teak with marine epoxy rather than mechanical fasteners, which reduces future leak points and allows thinner, lighter planking. Screwless, glued installation is now preferred by many yards for long-term watertightness.
- Caulk the seams and cure. Seam compound goes in, then the deck sits untouched through its cure window before sanding.
- Sand and finish. Final leveling and finishing brings the surface to spec.
- Final checks. Hardware gets re-bedded, the deck gets a leak test, and a post-install walk-through confirms everything drains and seals correctly.
Skipping step 3, or rushing it to hit a delivery date, is the single most common source of comeback problems in this trade, as detailed in this mast work and rigging removal guide.
Teak, Synthetic Teak, Cork, or Painted Non-Skid: Which Fits Your Boat?
The material decision comes down to how much maintenance you’re willing to do versus how much traditional look you want underfoot.
- Genuine teak delivers the appearance buyers expect on a premium yacht and, installed well, lasts 20 to 30 years with regular cleaning and periodic re-caulking. It’s also the highest-maintenance option and the most expensive to repair once damaged.
- Synthetic teak (Flexiteek, PlasDECK, SeaDek) trades some authenticity for a dramatically lighter maintenance load and typically a lower installed cost. Warranties commonly run around 10 years, shorter than teak’s service life, but owners in high-UV or seasonal-use climates often find the reduced upkeep worth the trade.
- Cork decking is lighter than teak and reasonably grippy wet, but it’s less proven long-term in harsh UV and salt exposure, and repair options are more limited if a section fails.
- Painted non-skid is the budget and weight-saving choice, cheapest to apply and easiest to touch up, but it lacks the look and feel that teak or synthetic teak provides.
Installation complexity favors synthetics when a yard has template or CNC-cutting capability, since pre-cut panels install faster than hand-fitted teak planking. Repairability tends to favor teak and cork, since damaged sections can often be patched locally, while some synthetic systems require replacing a larger panel. For boats that see heavy sun and infrequent use, synthetic or non-skid is usually the more practical call over a full teak commitment.
Tools, Adhesives, and Safety Gear for the Job
Whether you’re hiring it out or doing sections yourself, knowing what the job requires helps you judge a quote or a supply list.
- Demolition: heat gun, flat scrapers, oscillating multi-tool with a wide blade for lifting old planking; a rented floor grinder speeds up adhesive residue removal on tight budgets
- Adhesives: marine epoxy for bonding new planking to the substrate, valued for its strength and reduced leak points versus mechanical fastening
- Seam compounds: polysulfide or SIS 440 seam sealants are common choices; cure times vary by product, so schedule sanding only after the manufacturer’s specified window
- Consumables: teak plugs and bungs, stainless fasteners where mechanical fixing is used, masking tape, and acetone for cleanup
- PPE: respirator rated for solvent and epoxy fumes, nitrile gloves, eye protection, and knee pads for hours of low, kneeling work
Pro Tip: Tent the work area with plastic sheeting and keep a wet/dry vacuum staged nearby before you start stripping old teak. Once the deck is open, an unexpected afternoon shower can undo days of substrate drying in minutes.
What Hides Under Old Teak, and What It Costs to Fix
Removing decades-old teak almost always exposes something the owner didn’t know about. Cores fail slowly from years of small leaks around fasteners, and by the time you strip the planking, delamination or rot has often spread beyond the original leak point.
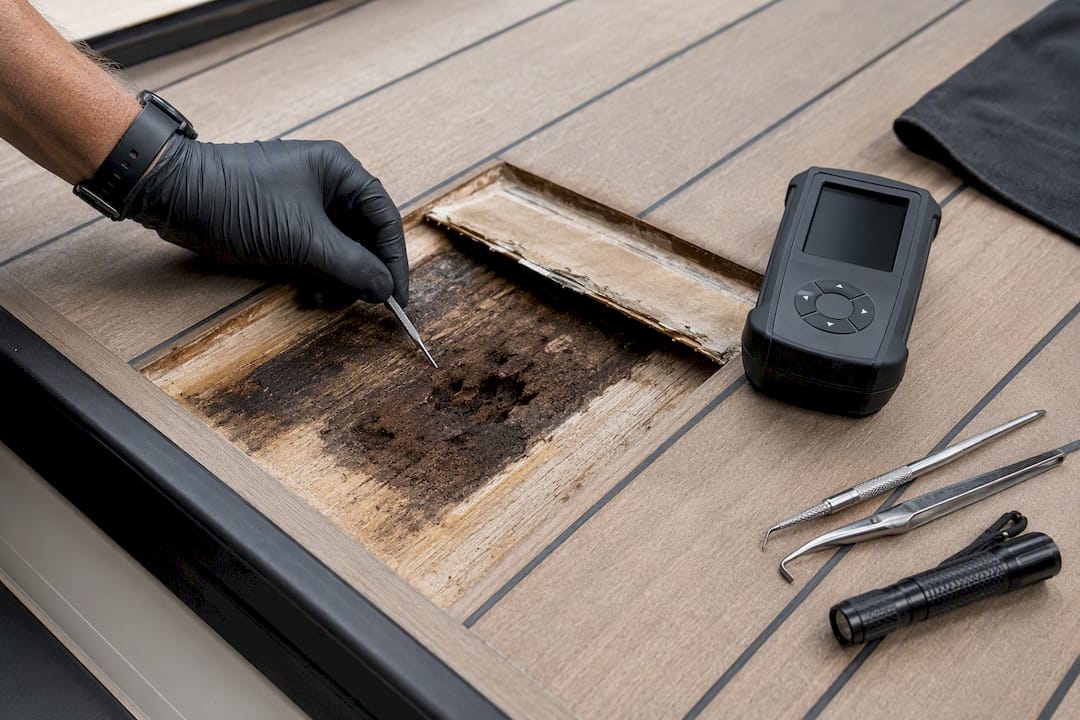
A few simple field tests tell you what you’re dealing with. Tapping with a mallet reveals hollow spots. Probing with an awl finds soft, punky substrate. A moisture meter confirms whether the core is actively wet or just stained from an old leak that’s since dried out.
Common repair paths once damage is found:
- Local glass patch: cutting out a small damaged section and rebuilding it with fiberglass cloth and resin, the least expensive fix
- Core replacement: removing and replacing balsa or foam core over a larger area, moderate to significant added cost
- Structural overlay: adding a new laminate layer over compromised substrate when full core replacement isn’t practical
Because you can’t know the extent of hidden damage until the old teak is off, structure every quote with a defined day rate or not-to-exceed clause for discovered work, rather than accepting a single fixed number that assumes a clean substrate. Reviewing common structural repair approaches before your project starts helps you ask sharper questions when the yard calls with bad news.
How Long Does It Take, and What Does Project Management Cost?

A cockpit-only synthetic install can wrap in a week. A mid-size teak deck typically runs 3 to 6 weeks. A full-boat replacement with any substrate repair can stretch past 8 weeks once cure windows and hardware re-bedding are factored in.
Caulking cure time is the schedule’s hard constraint. Polysulfide and silane-modified seam compounds need days to cure fully, and manufacturer guidance is explicit that sanding before that window closes risks seam failure. No amount of pushing the crew speeds up chemistry.
Owners routinely underbudget project management, which commonly adds 10 to 20% on top of direct install costs once scheduling, template-making, and subcontractor coordination are counted.
Project-management costs cover the site evaluation, scheduling around other yard work, and coordinating between the deck crew and any electrical or hardware subcontractors whose gear sits on top of the new planking. If you’re already planning other refit work, bundling the deck into that larger schedule usually saves money versus hauling out twice, and a broader look at refit budgeting is worth reading before you commit to timing.
Should You Hire a Yard or Do It Yourself?
Screwless, epoxy-bonded teak is the preferred modern method, but it only works if you can hold even clamping pressure, mix epoxy correctly, and guarantee a dry cure environment. If any of that gives you pause, hire the work out.
- Assess your skill honestly. Simple plank swaps and re-caulking are reasonable DIY projects. Full deck removal, substrate repair, and epoxy bonding across a curved surface are not beginner jobs.
- Require specifics in every quote. Ask for the exact seam compound brand and spec, the adhesive being used, warranty terms, references from a similar-size project, and whether the yard has template or CNC-cutting capability.
- Watch for red flags. Vague material specs, no written policy for handling discovered substrate damage, and pressure to sign before a site inspection are all warning signs.
- Reduce your own risk if going DIY. Do the demolition and cleanup yourself, then hire a professional specifically for the epoxy bonding and caulking stages, where mistakes are expensive to reverse.
How Long Will Your New Deck Actually Last?
A properly installed, well-maintained teak deck can last 20 to 30 years, with routine cleaning and periodic re-caulking as the seams age. Synthetic systems typically carry around a 10-year warranty and need far less ongoing maintenance, mostly rinsing and occasional cleaner application.
- Installation method matters for future repairability: bonded, screwless teak resists leaks longer, while mechanically fastened decks tend to develop leak points at each fastener over time
- Cork sits between the two, needing moderate upkeep but limited long-term data compared to teak
- The most common mistake that shortens any deck’s life is aggressive power-washing or harsh chemical cleaners, which erode the wood’s surface and open seams prematurely
Why Project Oversight Matters More Than the Material Choice
Every deck job we’ve watched go sideways went for the same reason: nobody managed the unknowns. The material almost never sinks a budget. The substrate does.
At Baranofyachts, our project-management work on refits and custom builds centers on exactly this kind of coordination, sequencing subcontractors, verifying substrate conditions before signing off on install schedules, and keeping caulk cure windows from colliding with a delivery date. That coordination is what keeps a deck replacement from turning into a haul-out that runs three months longer than planned.
- A thorough site evaluation before contract signing catches most hidden substrate problems early, when they’re cheaper to fix
- Coordinated scheduling between the deck crew, hardware subcontractors, and any concurrent refit work shortens total time in the yard
- A clear scope for discovered work protects owners from open-ended change orders mid-project
If your deck replacement is part of a larger refit, or if you simply want someone verifying the yard’s substrate findings before work proceeds, engaging an owner’s representative or broker with project-management experience is worth the fee. Our project-management approach exists for exactly this kind of coordination, keeping the schedule, the subcontractors, and the budget aligned from the first site visit through final inspection.
The Real Lesson in Every Teak Deck Job
Most guides on this topic treat the material choice as the central decision. It isn’t. The material is a five-minute conversation once you know your budget and climate. The substrate underneath is where every project actually lives or dies, and it’s the part almost no owner budgets for correctly the first time.
Conventional advice tells you to get three quotes and compare price per square foot. That’s fine as a starting filter, but it misses the point: a quote is only as good as the site evaluation behind it. A yard that quotes without pulling old teak first, or without probing the substrate, is guessing, and you’re the one who pays for the guess when the real number arrives mid-project.
If I had one piece of advice for someone staring at a checked, thumping deck, it would be this: pay for the inspection before you pay for the material. Spend a few hundred dollars getting a real substrate assessment, then negotiate the install contract with that information in hand. It’s the cheapest insurance in the entire project.
— Jason
Sources
- Replacing Teak Decks, the DIY-er’s Way — Practical Sailor
- Teak Boat Flooring: A Buying Guide That Pays for Itself – D and G Flooring
- Yacht Deck Replacement Cost: What Affects the Price? | TDS
Recommended
Sold Listings


Design Your Yacht
"*" indicates required fields
Maximus III - PNW
As you step aboard MAXIMUS III, the first impression is her scale.
At 120 feet with an 8-meter beam and 294 GT of interior volume, this 2025 Crescent Custom tri-deck immediately feels open, balanced, and estate-like. A timeless look while still feeling fresh from the shipyard.
Currently Available


Get your yacht value Estimate
"*" indicates required fields